Contacting Support
Having trouble with RaceEffects and need some help? Open a ticket with us and we’ll get back to you as quickly as possible!
Open a Support Request | Visit Our Forums
Configuring RaceEffects
Hardware
The RaceEffects: Hub offers 6 expansion ports for various modules, such as RaceEffects:Brake, RaceEffects:Wind and RaceEffects: Notify. There are 2 status lights, A (green) for the 5V system and B (red) for the 12V system. The ports are assigned in the following way:
Port 1
Device: Wind
Arduino Pins: 3 & 4
Port 3
Device: Timer
Arduino Pin: A4 & A5
Port 2
Device: Notify
Arduino Pins: 11 & 12
Port 4
Device: (Future)
Arduino Pin: 2 & 13
Port 5
Device: Brake
Motor Controller: Channel 1
Port 6
Device: Rumble
Motor Controller: Channel 2
Software
The RaceEffects: Hub is powered by SimHub, the industry standard simulation middleware. You’ll first need to download SimHub and install it. Once installed you’ll need to perform the following steps:
1. Launch SimHub
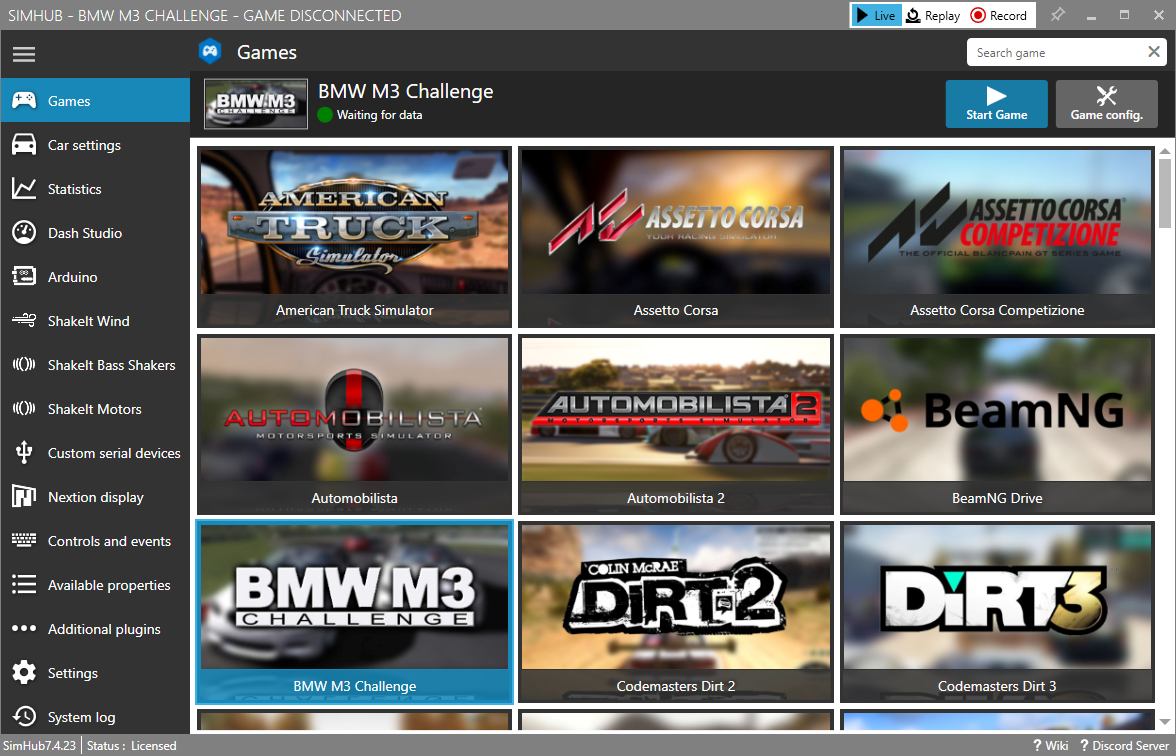
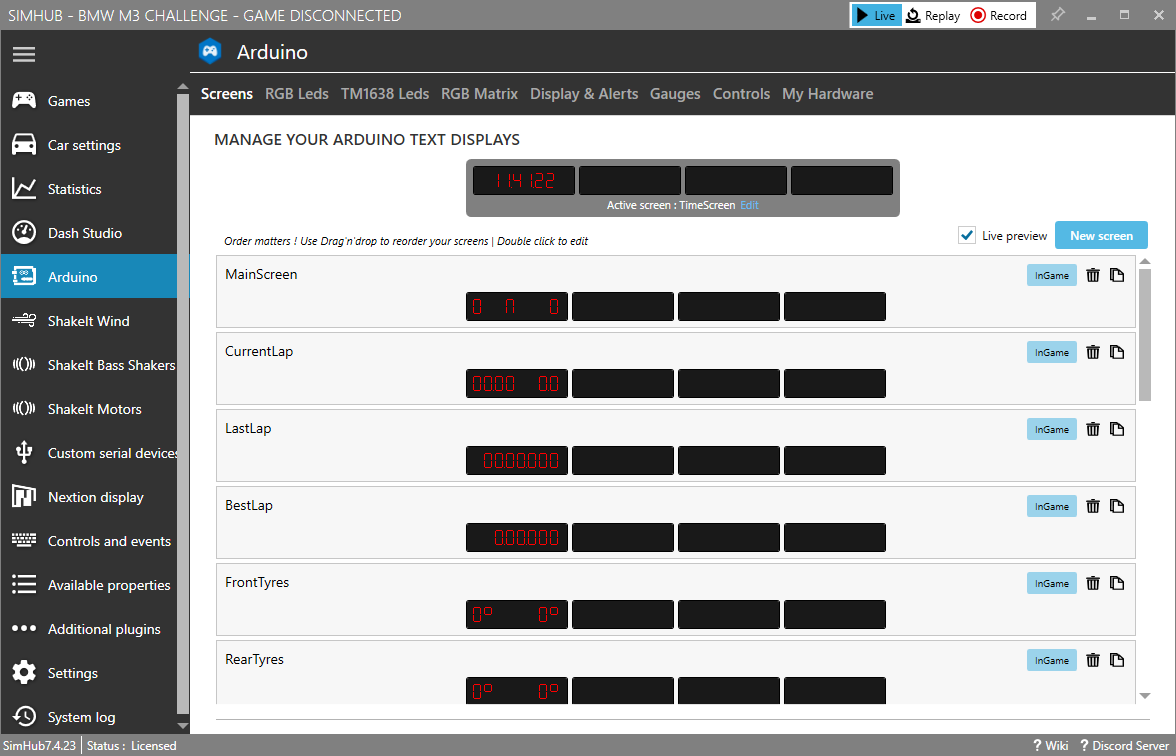
2. Click “Arduino” on the left
3. Click “Hardware” in the upper right
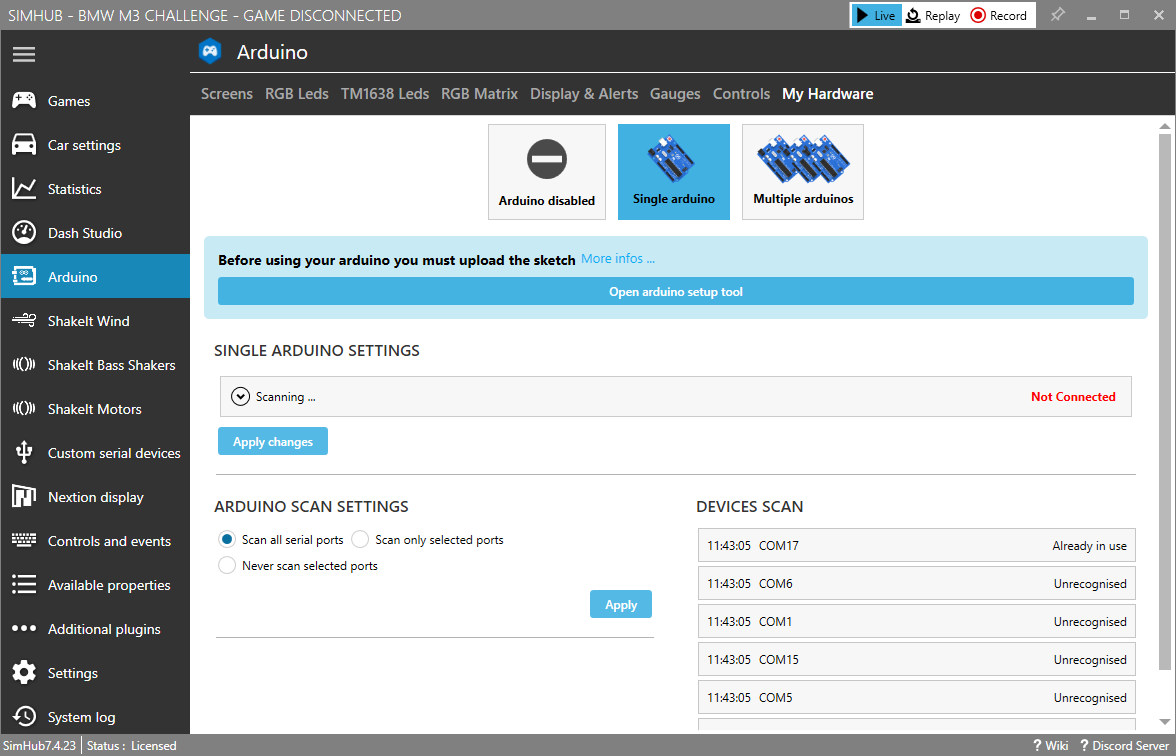
4. Click the “Open arduino setup tool” blue bar in the upper middle, this will launch the Sketch Setup tool.

5. Click “Start from scratch” which will continue to the main Sketch Setup tool
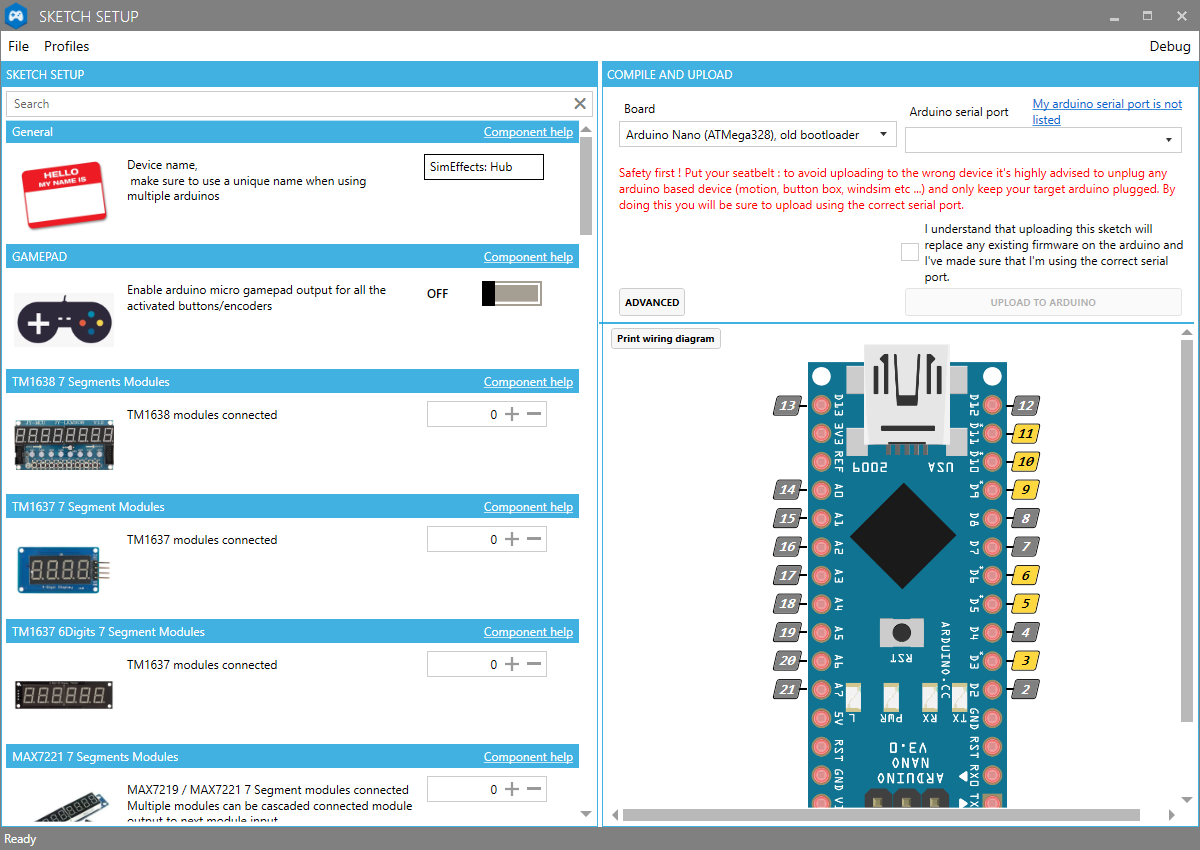
6. You’ll need to fill out the following fields based on your product choices.
ALL Devices
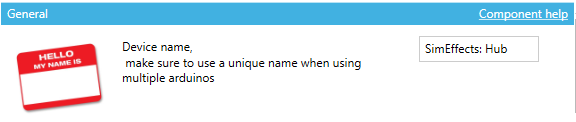
General – Device Name: RaceEffects: Hub
RaceEffects: Display
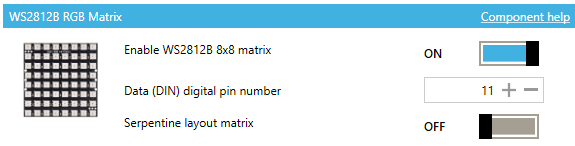
- Scroll to “WS2812B RGB Matrix”
(near the top) - Enable
- Set “Data (DIN) digital pin number” to 11
RaceEffects: Brake
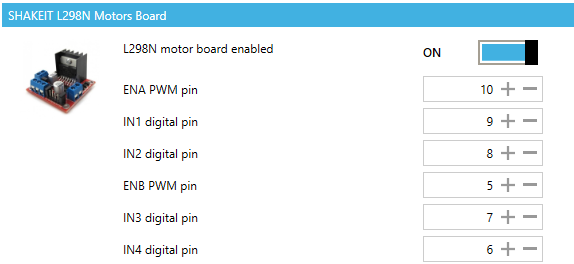
- Scroll to “SHAKEIT L298N Motors Board”
(near the bottom) - Enable
- Default settings are correct
RaceEffects: Wind
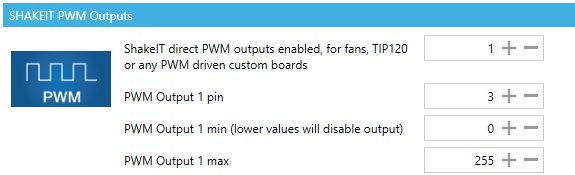
- Scroll to “SHAKEIT PWM Outputs”
(near the bottom, just below L298N Motors Board) - Enable
- Set “Data (DIN) digital pin number” to 3
7. ALL DEVICES: To complete Arduino setup in the upper right select your Arduino’s serial port (you’ll see “USB-SERIAL CH340” next to the name of the port (if you have other Arduino devices you’ll need to determine the port for RaceEffects using Windows Device Manager)
Click the check box for “I understand….”
Click “Upload to Arduino”
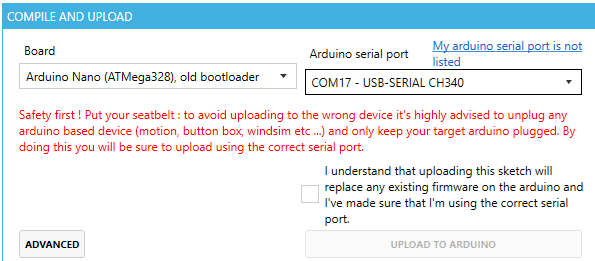
A popup will open, writing the settings to your RaceEffects: Hub. Next we’ll configure SimHub
8. RaceEffects: Display
To setup RaceEffects: Display you’ll need to be on the Arduino tab (on the left), then select “RGB Matrix” along the top
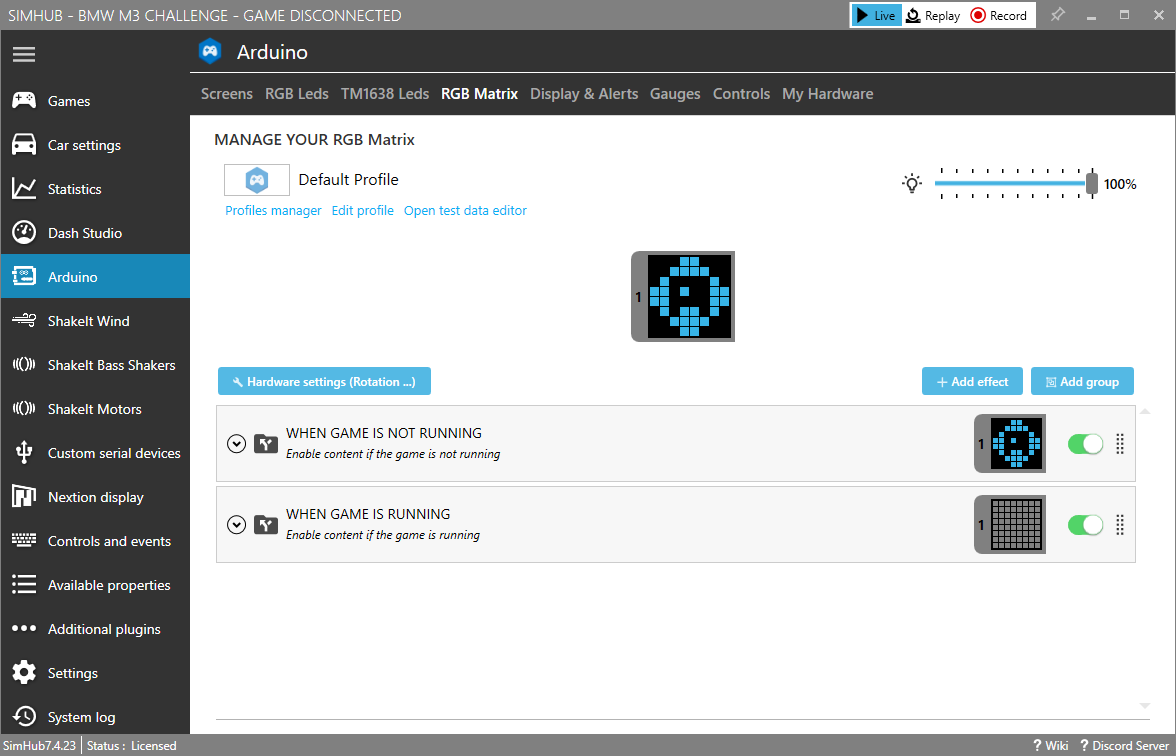
It is strongly suggested to disable “When Game is not Running”, as this will put an animation on Display when the game is not running.
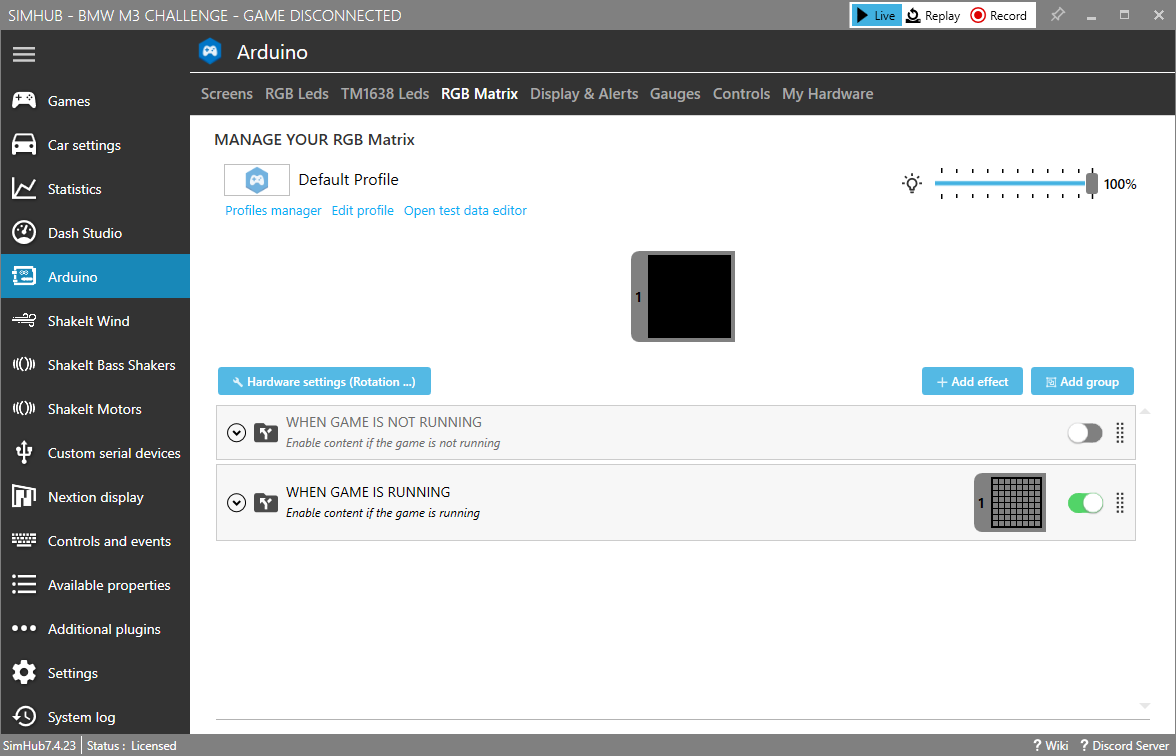
Expand “When Game is Running”, then expand “Flags”. It’s recommended to disable the “White” flag as it will display your entire final lap which can be annoying.
9. RaceEffects: Brake
To setup RaceEffects: Brake you’ll need to be on the “ShakeIt Motors” tab (on the left). Here we’ll setup a basic profile, see our forums for more advanced profiles.
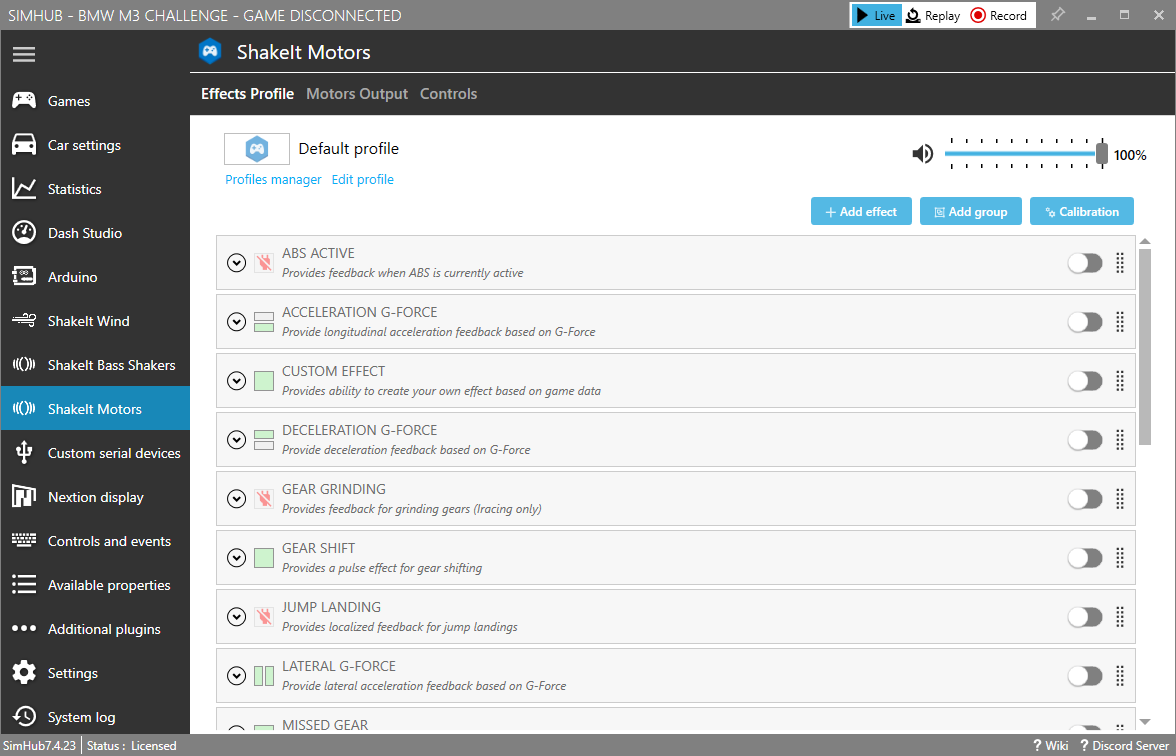
We’ll now need to create a custom effect – why not just use ABS Active? Many racing titles don’t support that – notably iRacing does not. So we’ll create our own custom profile to simulate this. Scroll down to “Custom Effect”, expand and enable it.
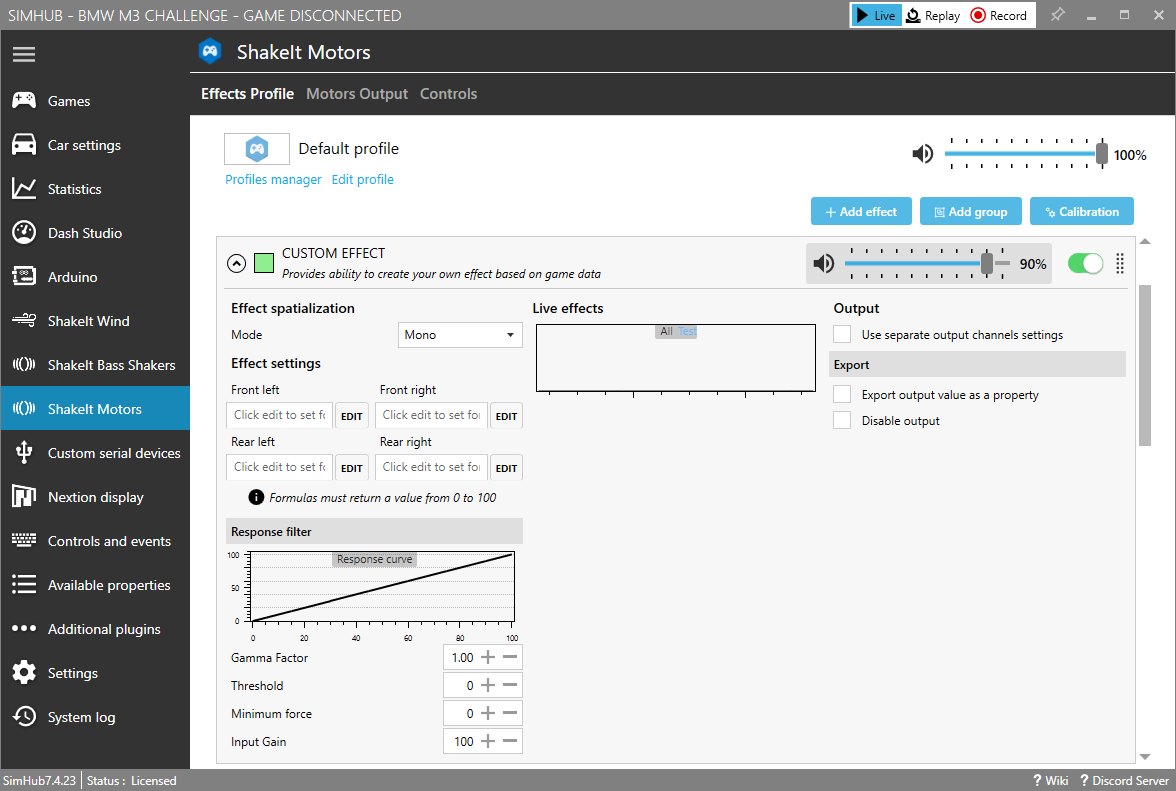
Next set “Mode” to “Mono” as we only have a single device and don’t need to track the 4 corners. You’ll then need to click “EDIT” next to each of the four corners of the car – this will open the Binding editor where you’ll click “Computed value” then paste in the following command
[GameRawData.Telemetry.BrakeRaw] * 100
Once all four corners are set you’ll need to set the Response filter thresholds. You’ll likely want to play with these and possibly change them on a per-car basis. For GT3 cars in iRacing the following are recommended

Gamma Factor: 1.00
Threshold: 65
Minimum forice: 60
Input Gain: 100

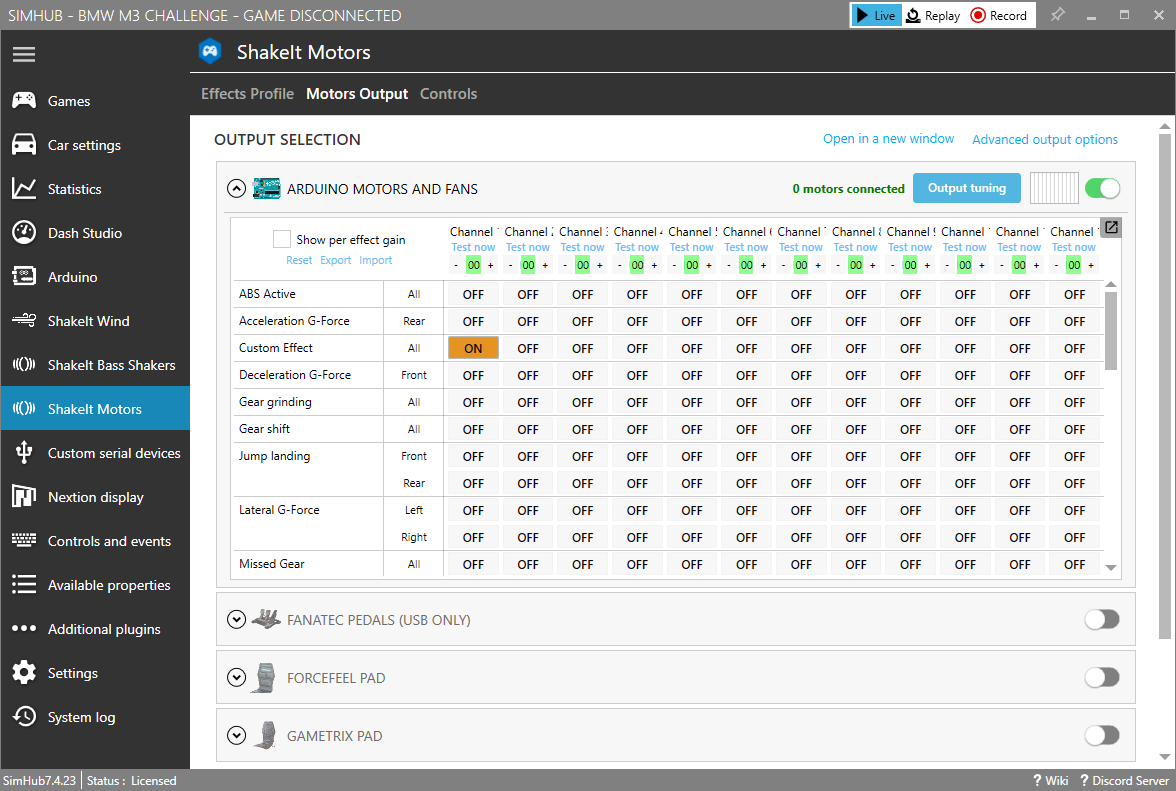
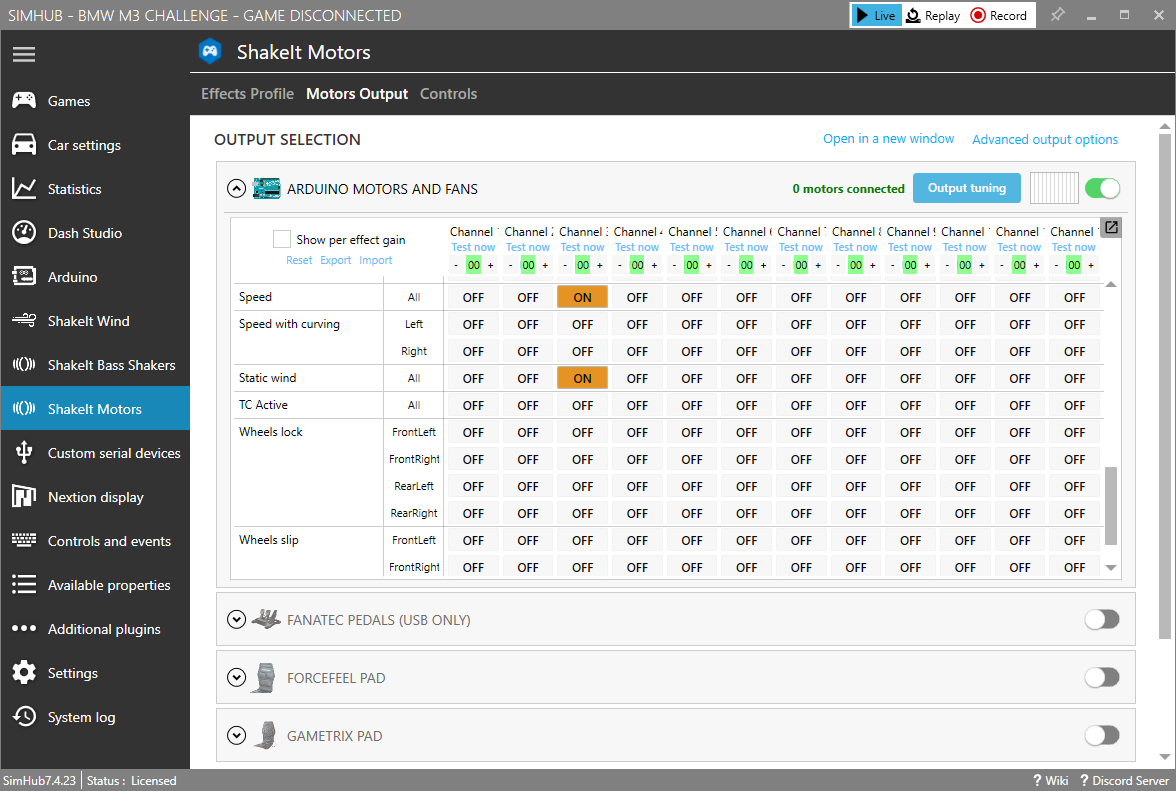
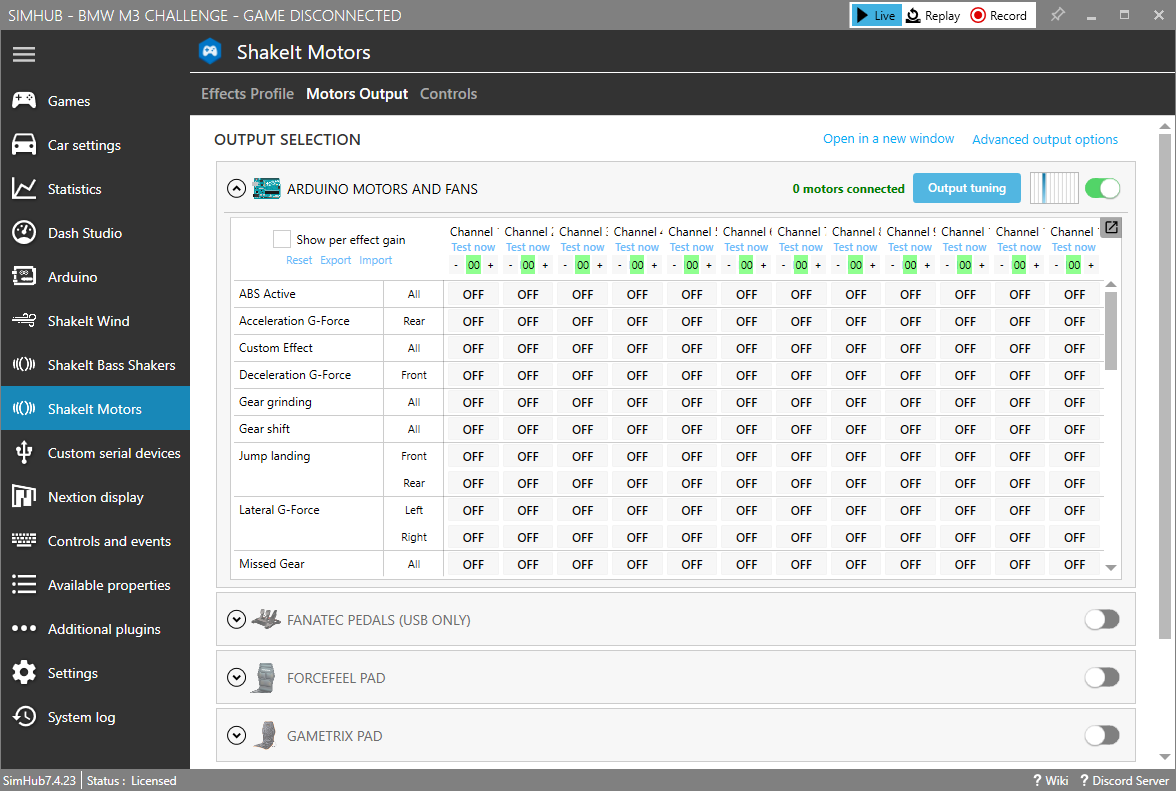
Now you’ll need to assign the effect to the appropriate channel for your rumble motor. Under ShakeIt Motors on the left you’ll select “Motors Output” in the upper left, just below “ShakeIt Motors”. First you’ll need to enable the first selection, “ARDUINO MOTORS AND FANS”

You’ll now need to determine which channel your brake rumble motor is attached to as while it should be channel one sometimes the Arduino will assign it to a different channel. All you need to do is click “Test now” under the channel with the system connected, when you find the correct channel you’ll hear/feel the motor rumble.
Once you’ve found the correct channel you just need to enable the correct effect for that channel, in this case we’ll be enabling the “Custom Effect” on channel 1.
10. RaceEffects: Wind
Configure RaceEffects: Wind to control your fans based on both vehicle speed and by manual control.
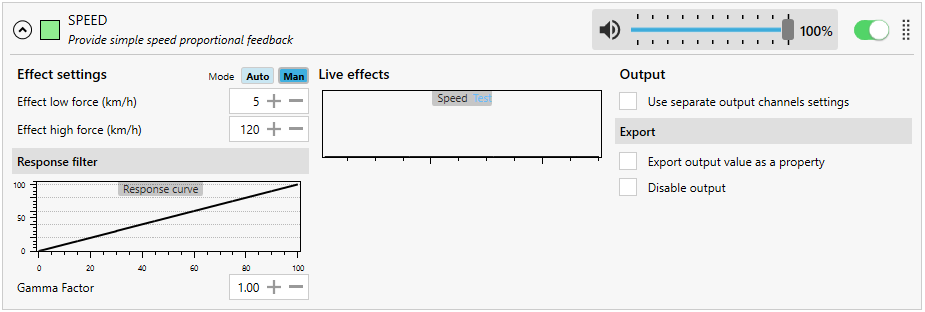
Speed Control: Scroll down to, expand and enable “Speed”. The default settings should be fine, although for certain titles/vehicles you may need to set the mode to “MAN” and set the upper and lower thresholds.
Manual Fan Control: You can also control your fan(s) manually, allowing you to use software (or a button box) to start/stop and set the speed of the fans. To do this scroll to “Static Wind”, expand and enable it.
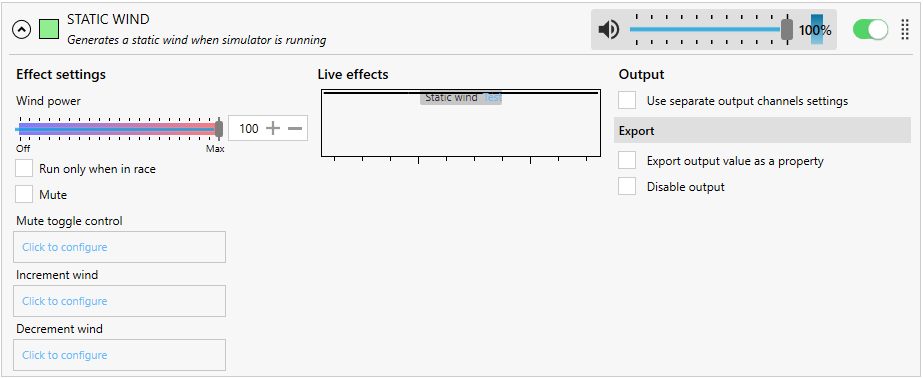
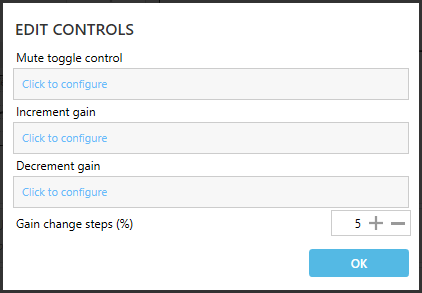
Binding to a Button Box: To bind any control to a button box, specifically for fan control, you’ll click the very small game controller icon that’s visible when you hover over the name (Static Wind). You can bind 3 buttons, “Mute toggle” will start/stop the fans, “Increment gain” and “Decrement gain” will increase/decrease the fan speed. It’s recommended to bind these two for both Static Wind and Speed, that way you can control the maximum power of the fans while racing.
Now you’ll need to assign the effect to the appropriate channel for your rumble motor. Under ShakeIt Motors on the left you’ll select “Motors Output” in the upper left, just below “ShakeIt Motors”. First you’ll need to enable the first selection, “ARDUINO MOTORS AND FANS”.
Once enabled you’ll want to determine which channel the fan is connected to, as while this should be channel 3 it can change based on your specific setup. With everything connected and the fan powered on you’ll need to click “Test now” under each channel to determine the correct one. Once you’ve determined this you’ll need to enable “Speed” and “Static Wind” (only enable the latter if you’re planning to control the fan via software)
11. RaceEffects: Rumble
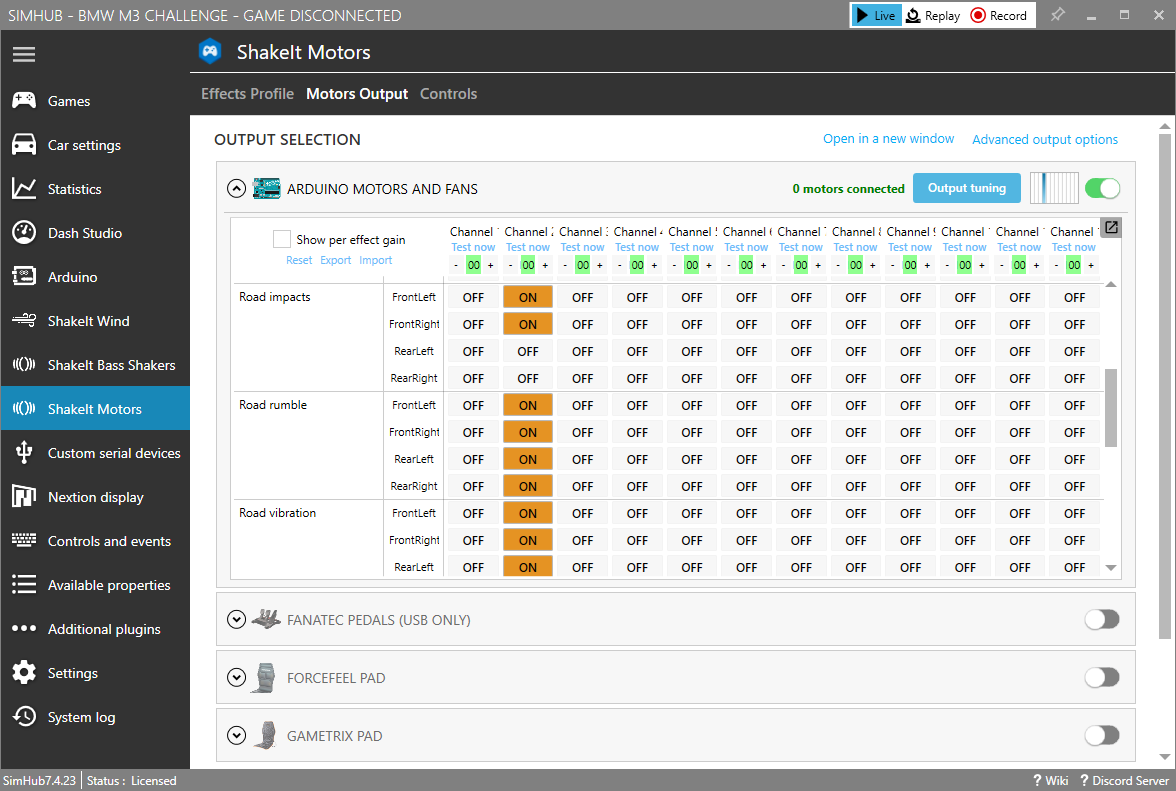
To configure RaceEffects: Rumble you’ll need to assign the following channels under “ShakeIt Motors”, “Motors Output”
The following effects are recommended:
– Gear Grinding
– Gear Shift
– Road Impacts
– Road Rumble
– Road Vibration
– Simulated Road Texture
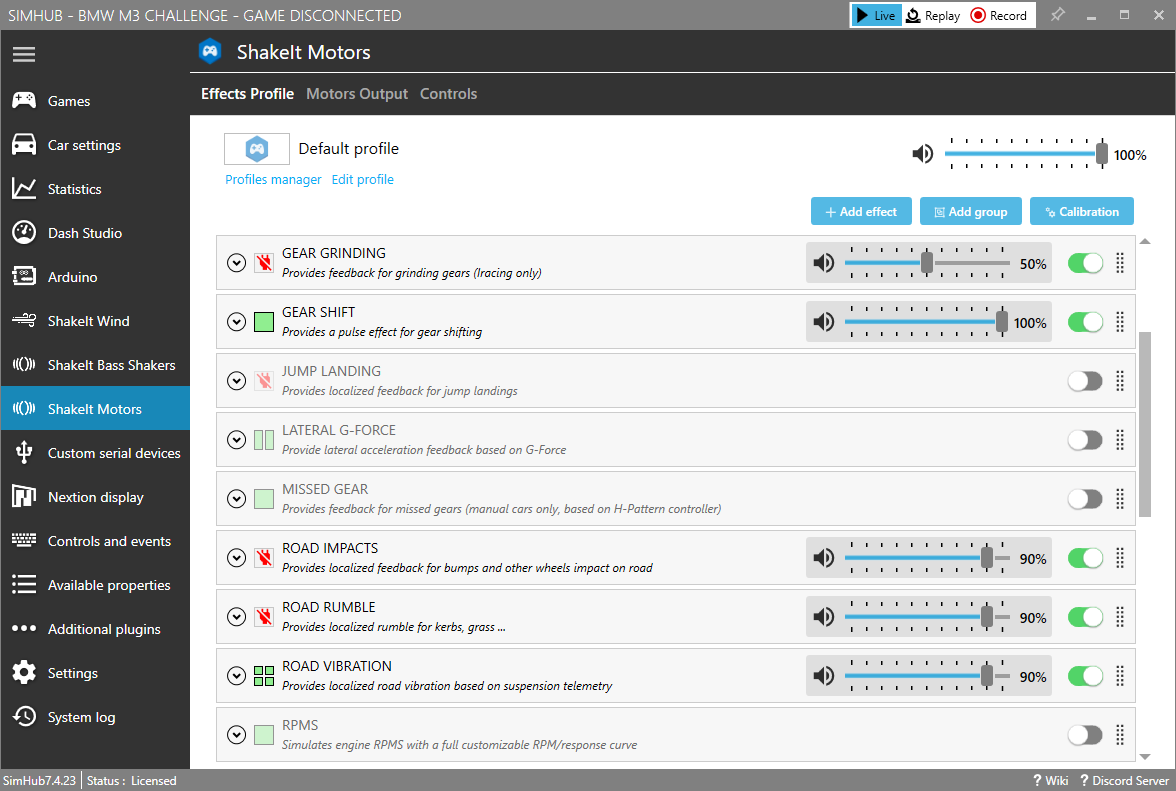
Now you need to enable each of the Effects Profiles you’d like to use, the following and their default volume levels are recommended. You’ll however likely want to tune these by adjusting their individual channel volumes. We recommended dialing in each Effect one by one to keep them from overlapping while tuning.
– Gear Grinding
– Gear Shift
– Road Impacts
– Road Rumble
– Road Vibration
– Simulated Road Texture
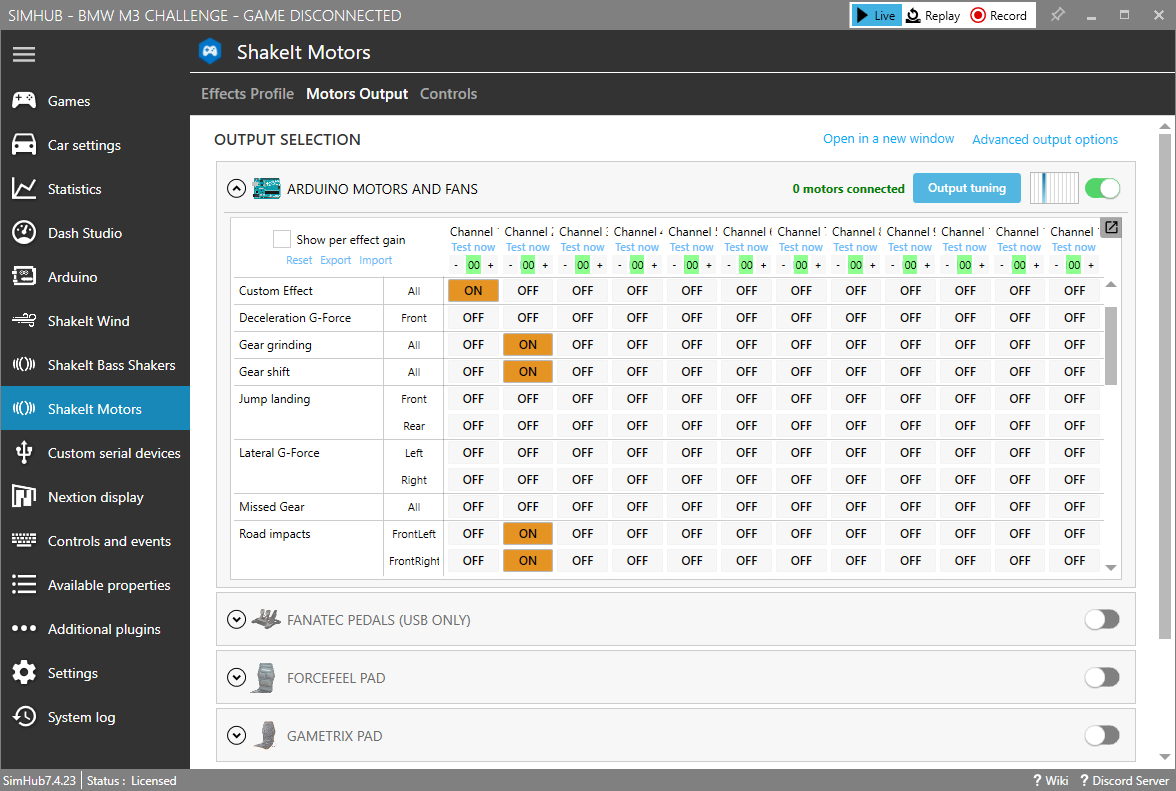
12. Assigning Device Channels
Finally we need to determine what channels each of your devices are on in the event they aren’t on the default channels. Those should be:
- Channel 1: Brake Rumbler (top right port on the RaceEffects: Hub)
- Channel 2: Rumble (bottom right port on the RaceEffects: Hub)
- Channel 3: Wind (bottom left port on the RaceEffects: Hub)
To configure this you’ll head to the “ShakeIt Motors” tab on the left, then “Motors Output” along the top. Then expand “Arduino Motors and Fans”
Under each channel, near the top, you’ll see “Test now”. Click “Test now” with your Brake, Rumble or Wind module connected and you should see/hear them activate. Then under their respective channel enable the Effects Profile we set in previous steps.
NOTE: There is only a single “Custom Effect”, if you create additional custom effects they will all be under the same heading
13. Complete
This should complete the SimHub setup for RaceEffects. If you have any problems please contact us via our forums or open a ticket and we’ll get back to you as quickly as possible!